How To Carve a Turkey: An Easy Step-by-Step Guide
Congratulations, you’ve roasted a golden-brown turkey! The next step is carving, a task that is much less intimidating than it first appears. With these simple, step-by-step instructions, you will learn how to carve a turkey like a pro. Even if this is the first turkey you have ever roasted (smoked, or deep-fried), we’ll guide you through carving with confidence so that you can serve a beautiful, juicy turkey this holiday.
Pro Tips for Carving Turkey
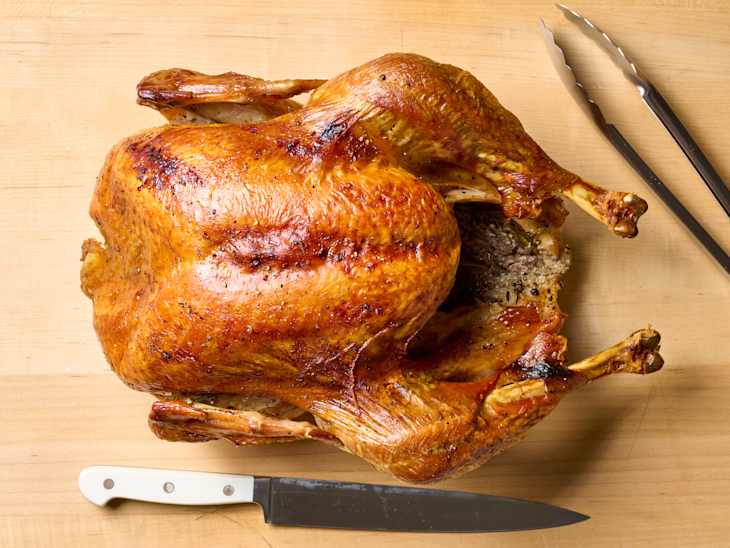
- Prepare your carving area. Before you make your first slice, gather your cutting board, chef’s and/or carving knife, serving platter, tongs, and paper towels.
- Work on one side of the turkey at a time. This is key to this easy turkey carving technique. With this set-up, you should only need to turn the turkey once. No flipping, turning, or rotating required.
- Remove sections of the turkey before slicing. Don’t attempt to carve perfect slices directly from the roasted bird. Remove the breast, drumstick and thigh sections in large pieces, then cut into slices for serving.
What You’ll Need To Carve a Turkey
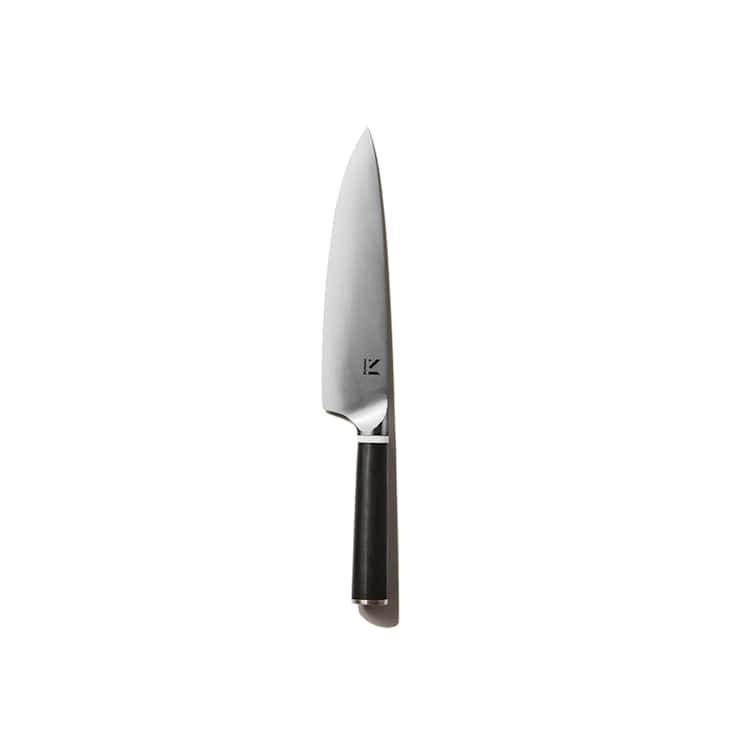
- Sharp Chefs Knife: A chef’s knife works well for carving a turkey. If you haven’t sharpened your knife in a while, consider going to a cooking store and seeing if they offer services for sharpening knifes. A sharp knife will make carving a turkey mush easier and faster!
- A Carving Knife: Alternatively, use a manual or electric carving knife to carve a turkey. Electric carving knives work by rapidly vibrating the blade back and forth, taking much of the work out of slicing.
- Large Cutting Board: Use a thoroughly cleaned cutting board with grooves on the sides. Choose a board that is large enough to hold the whole turkey and catch any accumulated juices. Stabilize the cutting board by placing a mildly damp towel or a non-slip mat underneath.
- Serving Platter: Make sure a sturdy serving platter, preferably one that is heat- or oven-safe, is standing by. An oven-safe serving platter provides a place to put the carved turkey, and can safely be put in the oven at a low temperature and kept warm. Tongs and paper towels are also helpful.
How To Carve a Turkey: A Step-by-Step Guide
Step 1: Let the Turkey Rest
Take the temperature of the turkey properly, then let it rest for at least 30 minutes. Resting helps the meat reabsorb its juices, so that every bite is moist and delicious. Fewer juices will spill out onto the cutting board and countertop from a rested bird. It is the best way to prevent the carved turkey from drying out.
Step 2: Set Up Your Carving Station
While the turkey rests, set up your carving station. Stabilize a cutting board large enough to hold the turkey, and gather tongs, a chef’s and/or carving knife, and serving platter close by. Keep paper towels within reach to keep the workspace clean.
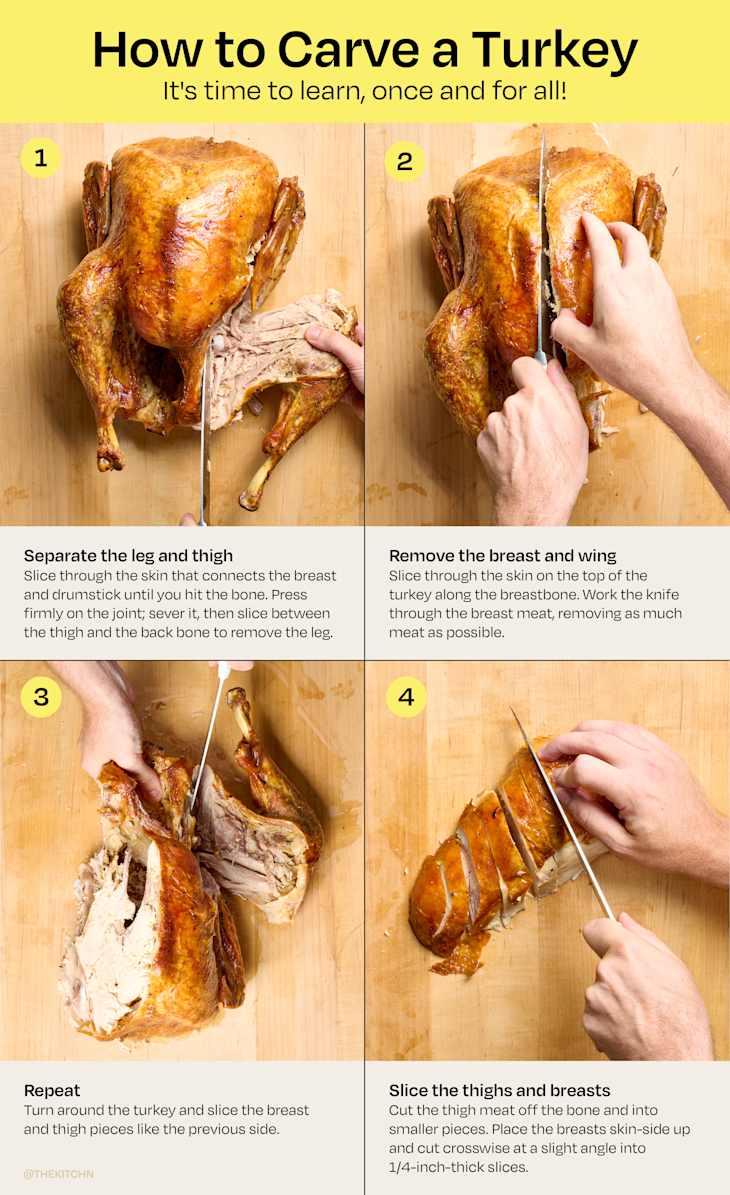
Step 3: Separate the Leg and Thigh
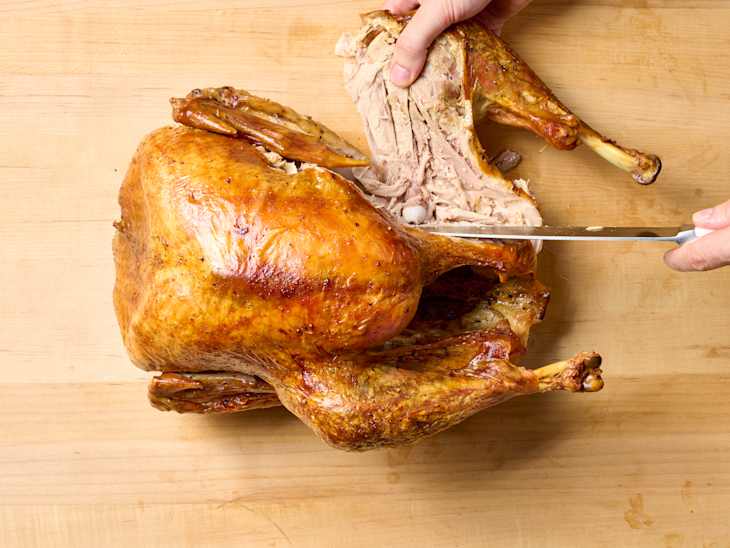
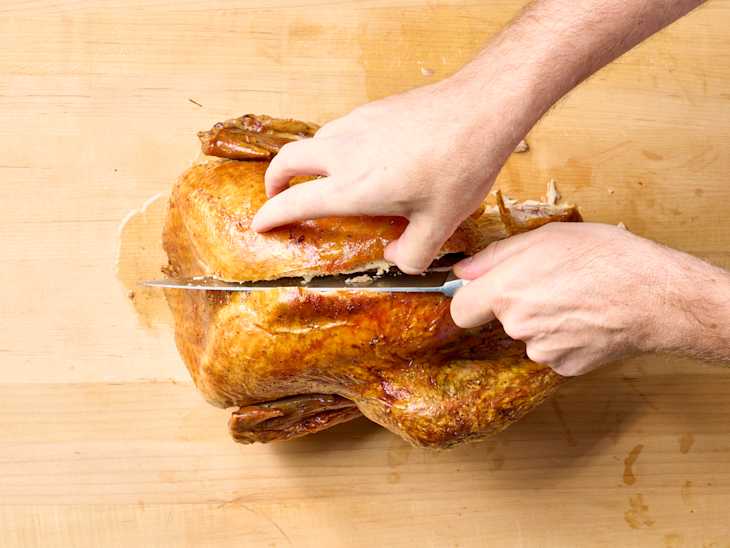
Slice through the skin that connects the breast and the drumstick until you hit the bone. Pull the leg back and down until the joint pops out. Press down firmly on the joint to completely sever it. Run the knife between the thigh and the back bone to cleanly remove the leg piece. Place on the serving platter.
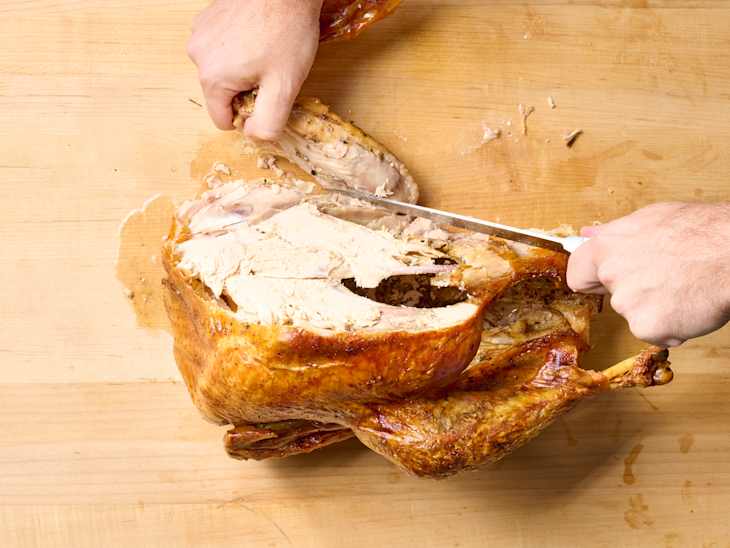
Step 4 : Remove the Breast and Wing from the Same Side
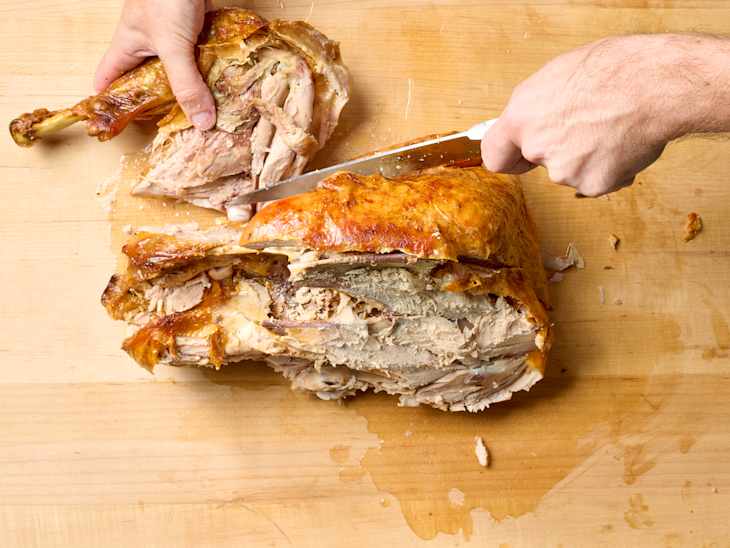
Continue on the same side of the turkey, and slice through the skin on the top of the turkey along the breastbone from the neck joint and the wishbone. Slowly work the knife through the breast meat, along the rib bone, removing as much meat as possible. Place this breast on the platter. Pull the wing back, as you did the legs, and cut through the joint to separate. Place on the platter.
Step 5: Repeat with the Other Side
Rotate the turkey 180 degrees and then repeat steps 2 through 4, removing the leg and thigh, breast, and wing on the other side.
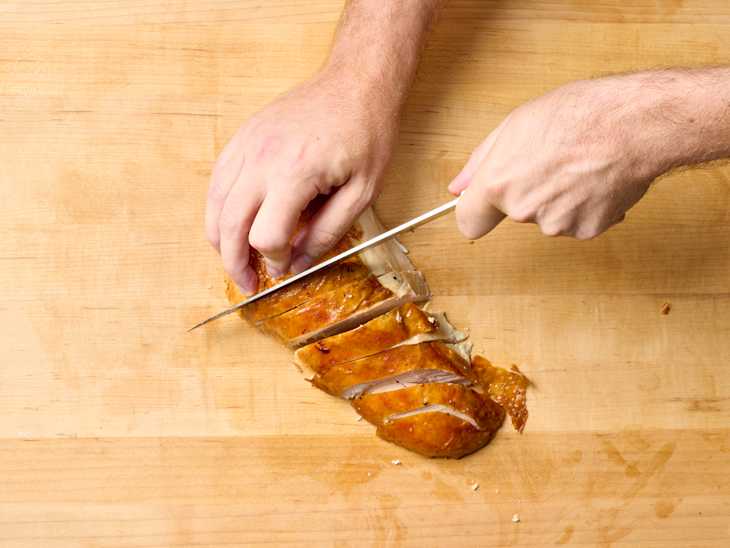
Step 6: Slice the Thighs and Breasts
Slice the thighs: Cut the thigh meat off the bone and into smaller pieces, if desired. Return to the platter.
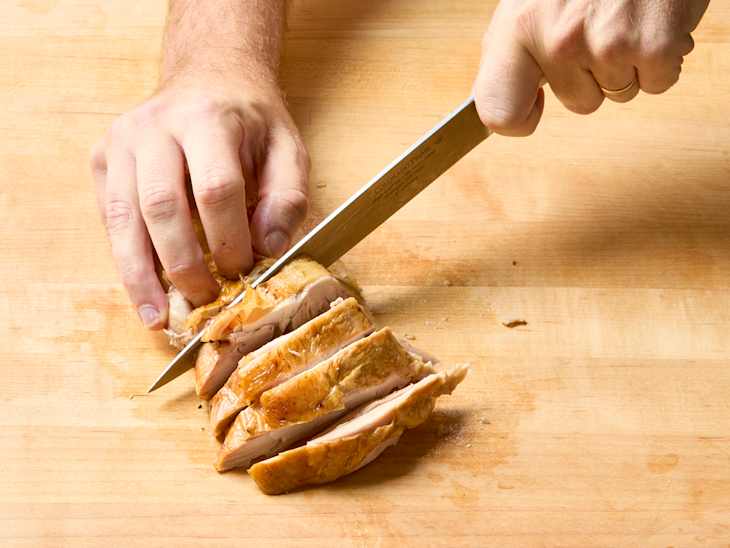
Slice the breasts: Place the breasts skin-side up on the cutting board. Cut crosswise at a slight angle into 1/4-inch-thick slices. Return to the platter.
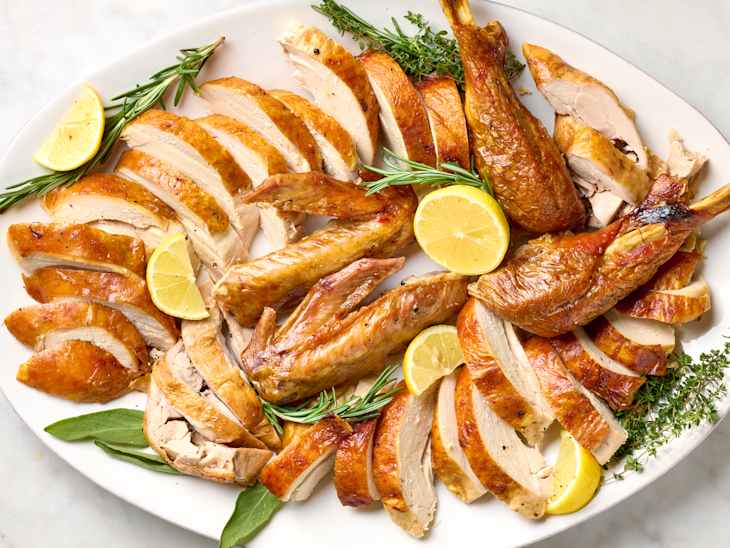
Remember that carving is going to cool your turkey significantly, so you’ll want to serve it right away or cover it with aluminum foil and stash in a warm oven until serving.
How To Store Leftover Turkey
Store white meat and dark meat separately so it’s easy to find what you want. Consider pre-slicing the turkey if the, ahem, lazier of the hungry guests will only eat leftovers if they are already cut up. Weigh out meat for soups and casseroles now, and add them to labeled containers so that no one accidentally turns it into a sandwich. Store in the refrigerator for up to 4 days or freeze for up to 2 months.
How To Carve a Turkey
Nutritional Info
Ingredients
- 1
roasted and rested turkey (get instructions here)
Equipment
- Large cutting board, preferably with channels to catch the juices
- Sharp chef's knife
- Paper towels
- Tongs
- Serving platter
Instructions
Set up a carving station. Place the turkey on a large carving board. Make sure you have your serving platter, paper towels, a sharp chef's knife, and tongs at the ready. Remove the trussing string if needed using the tip of the knife and arrange the turkey so the legs are facing you.
Remove the leg and thigh together. Slice through the skin that connects the breast and the drumstick until you hit bone. With your hands (and either paper towels or a clean kitchen towel), pull the leg back and down until the joint pops out. Press down firmly on the joint to completely sever it. Run the knife between the thigh and the back bone to cleanly remove the leg piece. Place on the serving platter.
Remove the breast. Staying on the same side of the turkey, slice through the skin on the top of the turkey along the breastbone from the neck joint and the wishbone first. Then slowly work the knife through the breast meat, along the rib bone, removing as much meat as possible. Place this breast on the platter.
Remove the wing. Pull the wing back, as you did the legs, and cut at the joint. Place on the platter.
Turn the turkey and repeat steps 2 through 4 on the other side. Rotate the turkey 180 degrees and then repeat with removing the leg and thigh, breast, and wing on the other side.
Set aside the turkey carcass and wipe down the cutting board. Remove the turkey carcass from your work area (you can set it back in the roasting pan or set it directly into a pot if you plan on making stock). Wipe down your cutting board if desired.
Separate the thighs from the drumsticks. Place the leg pieces skin-side up on the cutting board. Cut right between the drumstick and thigh at the joint. Repeat with the other leg. Return the drumsticks to the platter.
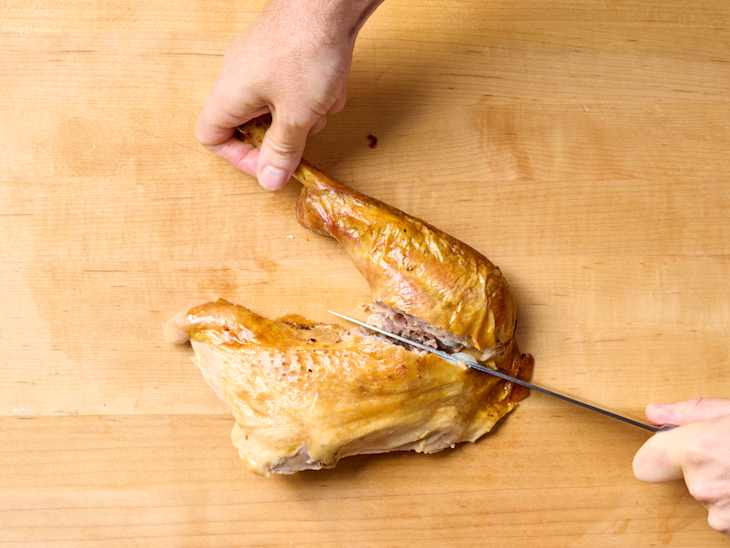
Slice the thighs. Cut the thigh meat off the bone and into smaller pieces, if desired. Return to the platter.
Slice the breasts. Place the breasts skin-side up on the cutting board. Cut crosswise at a slight angle into 1/4-inch-thick slices. Return to the platter.